Agent Dashboard
The Agent Dashboard is a Progressive Web App (PWA) designed specifically for support agents to handle live chat conversations with customers.
It is separate from the full BrainBots Business Dashboard, which is reserved for the business owner.
1. Access and Login
Business Owner Direct Access (Agent Mode)
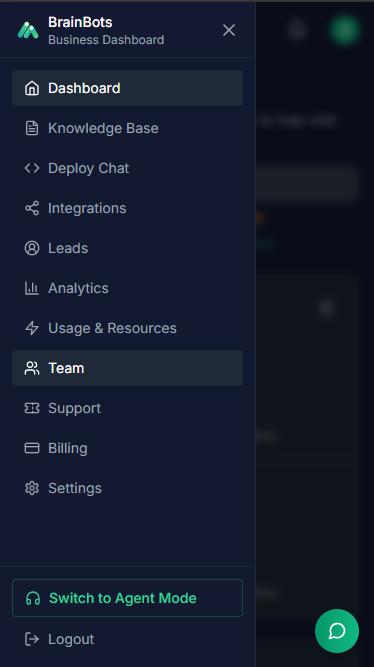
The Business Owner can bypass the standard agent login flow to access the Agent Dashboard directly from the main Business Dashboard.
• Location: Look for the "Agent Mode" button located in the bottom left corner of the main Business Dashboard, situated just above the "Logout" button.
• Access: Clicking this button provides automatic and immediate login to the Agent Dashboard PWA.
• Feature Parity: The Business Owner has access to all Agent Dashboard features available to standard team members, including status management, session handling, and customer communication.
Agent Invitation Process (Business Owner)
The Business Owner initiates the process from the Team Management page.
• Access: The Business Owner navigates to the Team page, located at /dashboard/team, (this feature requires a paid plan: Basic or Pro).
• Initiate Invite: The owner clicks the "Invite Agent" button.
• Fill in Form: The owner fills in the required details on the invite form, which includes the agent's email address (required), the agent's name, and the phone number (optional).
• Send Invitation: The owner clicks "Send Invitation".
• Agent Status: The new agent's Account Status is immediately set to "Invited".
Agent Registration and Login Process (The Agent)
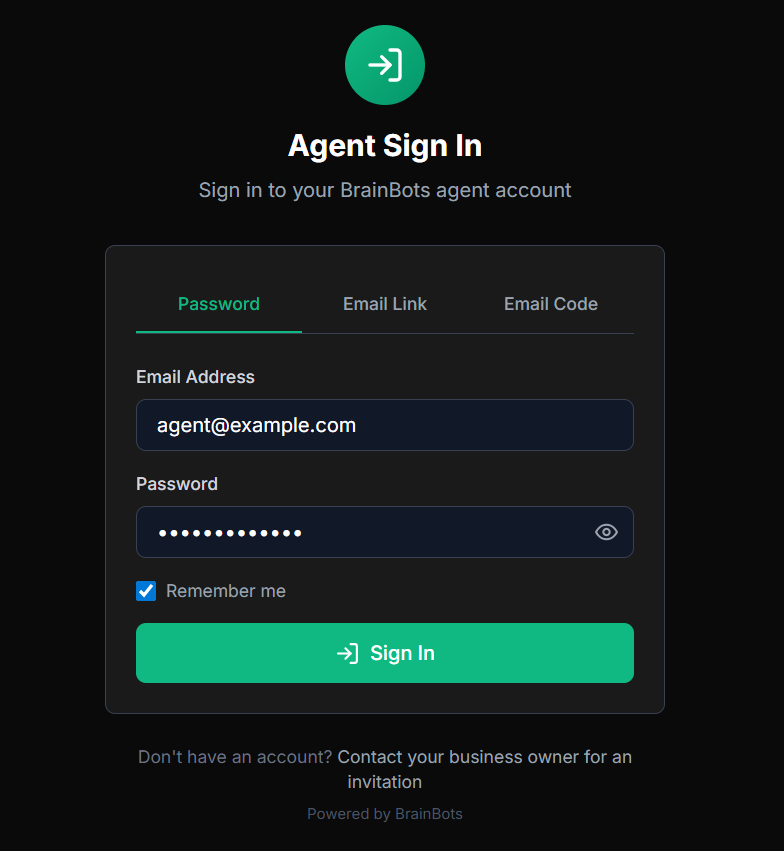
Once the invitation is sent, the agent receives an email to set up their account.
• Receive Email: The agent receives an invitation email that contains a setup link and a welcome message.
• Registration: The agent must click the link to create a password. This completes their profile setup and preferences.
• First-Time Login: After setting their password and completing registration, the agent is redirected to the Agent Dashboard. The agent's Account Status changes to "Active".
• Subsequent Login: For all future logins, the agent must go to this link - BrainBots Agent
Note on Agent Access: Agents use the Agent PWA (Agent Dashboard) for live chat handling and generally cannot access the main Business Dashboard.
2. Dashboard Overview and Components
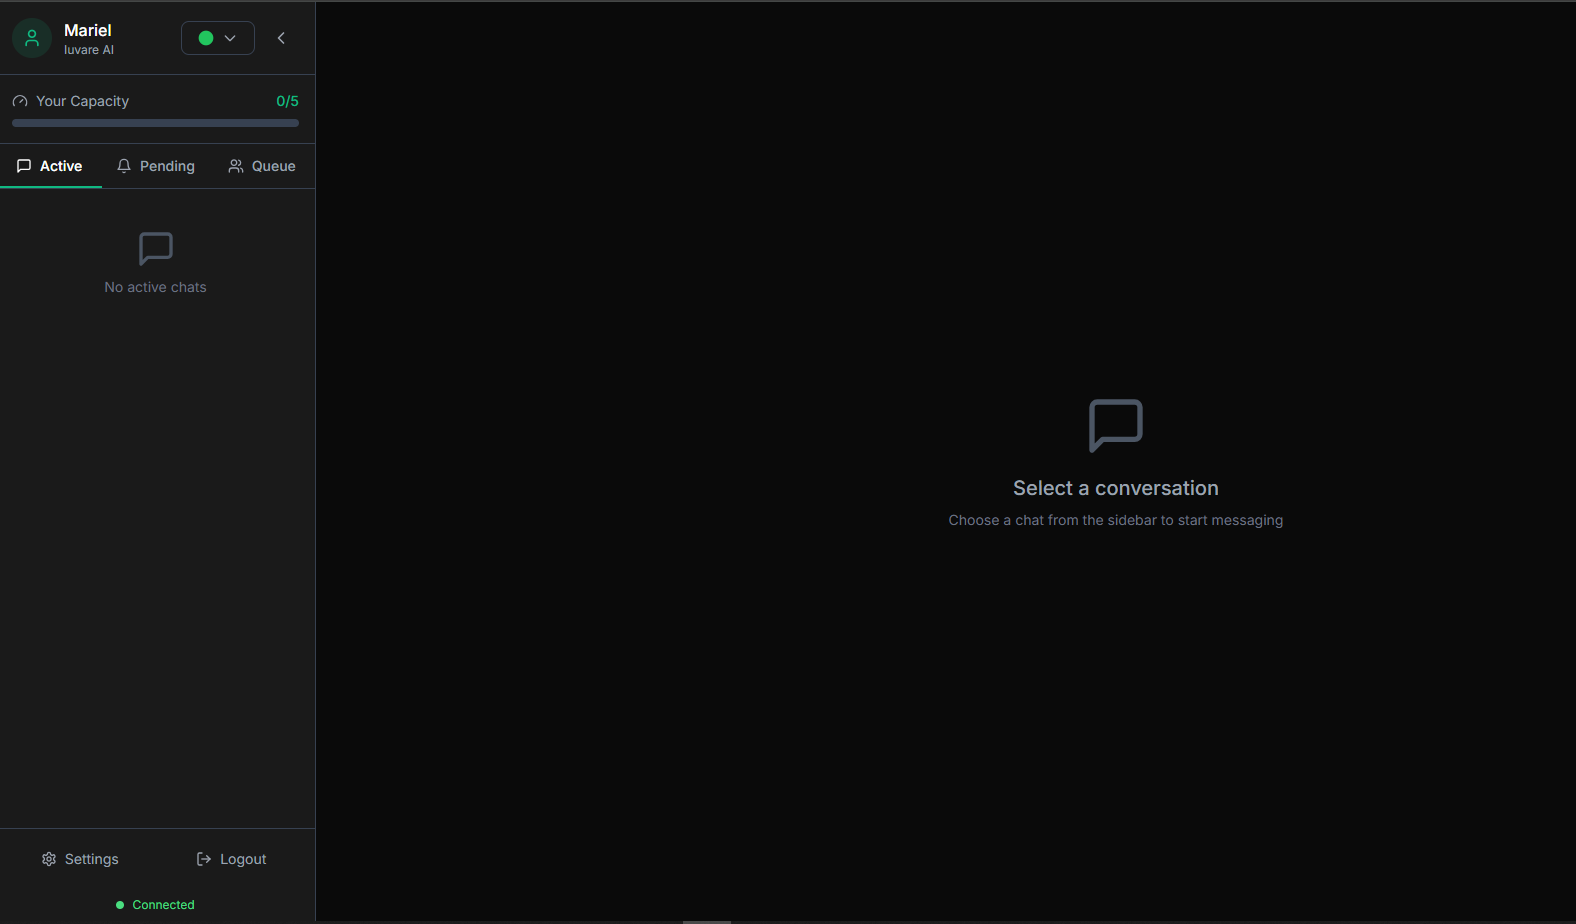
The Agent Dashboard is divided into a Sidebar (Left Panel) and the Main Chat Area (Right Panel).
Sidebar (Left Panel)
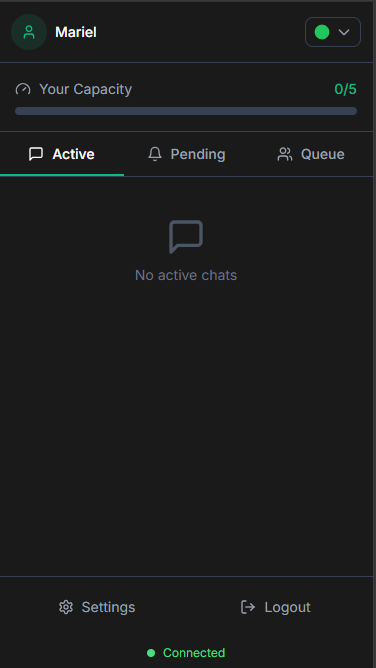
The sidebar is your control center for managing workload and status:
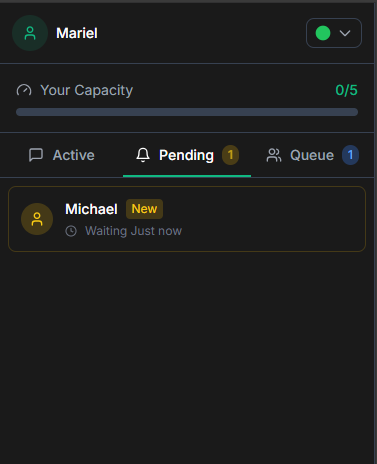
• Agent Profile: Displays your name, current status, and the tenant/business name.
• Status Selector: Used to change your availability.
• Capacity Indicator: A visual bar showing your current chat load (e.g., 2/5 chats).
• Session Tabs: Allows you to switch between the Active, Pending, and Queue views.
• Session List: Lists all chat sessions based on the selected tab.
Capacity Indicator Colors
| Color | Description |
|---|---|
| 🟢 Green | Under 80% capacity; available for more chats. |
| 🟡 Amber | 80-99% capacity; approaching the limit. |
| 🔴 Red | At 100% capacity; no new chats will be assigned. |
3. Agent Status Management
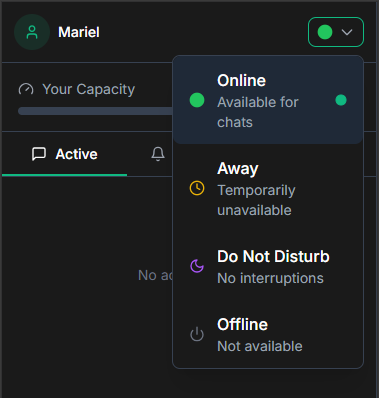
You must actively manage your status to ensure proper chat assignment.
| Status | Icon | Description |
|---|---|---|
| Online | 🟢 Green circle | Available to receive new chats. |
| Away | 🟡 Yellow clock | Temporarily unavailable (e.g., break, lunch). |
| Do Not Disturb (DND) | 🟣 Purple moon | No interruptions; will not receive new chats. |
| Offline | ⚫ Gray power | Not available; typically used for the end of a shift. |
Note on Business Hours: During set business hours, the Offline status option is disabled/grayed out to ensure adequate customer coverage.
4. Managing Chat Sessions
The Agent Dashboard organizes chats into three session types:
| Session Type | Description |
|---|---|
| Active Sessions | Conversations you are currently handling. |
| Pending Sessions | Handoff requests from customers waiting to be accepted by an agent, displaying the waiting time. |
| Queue | Customers waiting in line when all agents are at capacity; they are assigned as capacity becomes available. |
Accepting a Chat
When a session appears in the Pending tab, clicking on it automatically accepts the session. The session status changes from "pending" to "active," your personalized welcome message is sent, and your capacity count increases by one.
5. Communicating with Customers
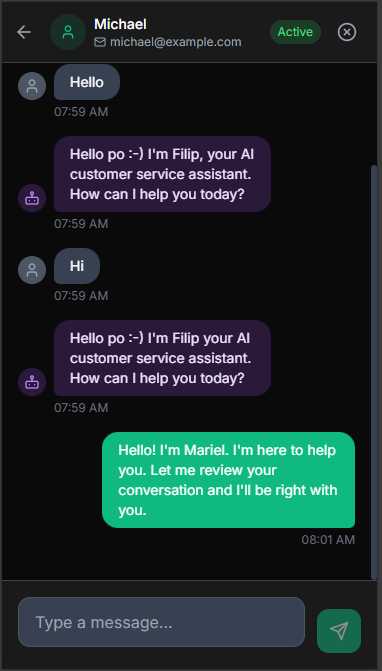
When you accept a chat, the message history displays the full conversation, including messages from the bot, the customer, and any other agents.
• Sending Messages: Type your message in the input field and press Enter or click the Send button. Use Shift + Enter to create a new line within the message input.
• Real-Time Updates: New messages appear instantly, so refreshing the page is not necessary.
Handling Facebook Messenger Chats
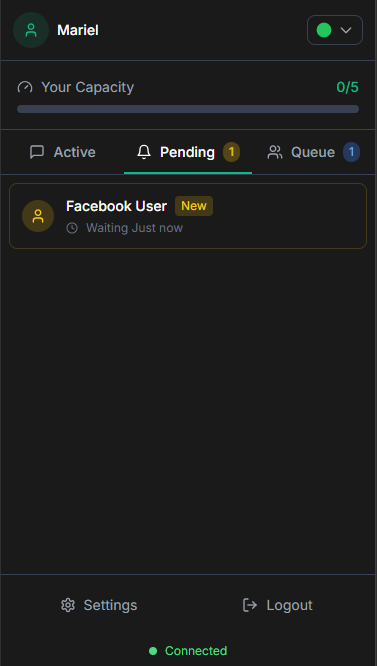
Messenger chats are identified by a "Facebook Messenger" source indicator and show the customer's Facebook name and profile picture when privacy settings permit. When you accept a handoff request from Messenger, your messages are sent directly to the customer's Facebook Messenger app. Agents must be aware that messages are currently text-only and Facebook enforces a 24-hour response window after the customer's last message.
6. Closing Sessions
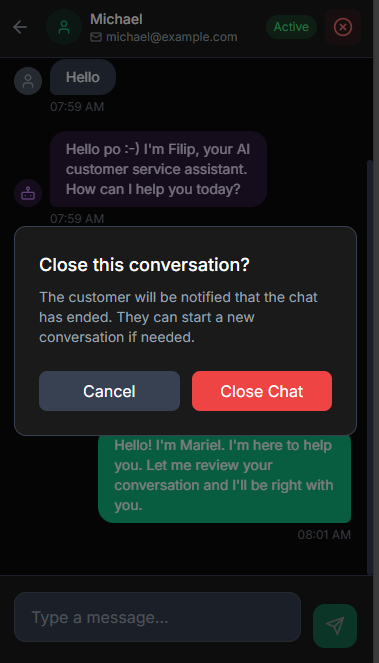
When a conversation concludes or the issue is resolved, you should close the session.
Closing Process
1. Click the X button or Close Session option in the chat header.
2. Your personalized closing message is automatically sent to the customer.
3. The session is archived, your active chat capacity decreases by 1, and the AI bot resumes handling future messages.
Post-Closure Rating
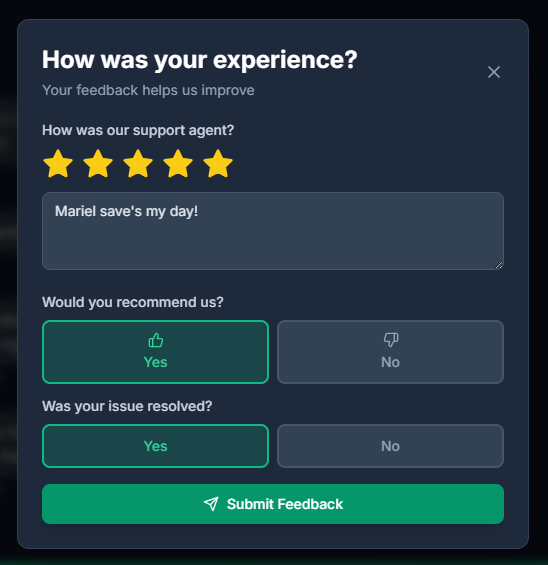
After closing, customers receive a satisfaction survey: web chat customers see a rating modal, while Facebook Messenger customers receive a multi-step rating flow via quick replies.
7. Agent Settings and Notifications
Agent Settings are accessed by clicking the Settings icon (gear) in the sidebar or header.
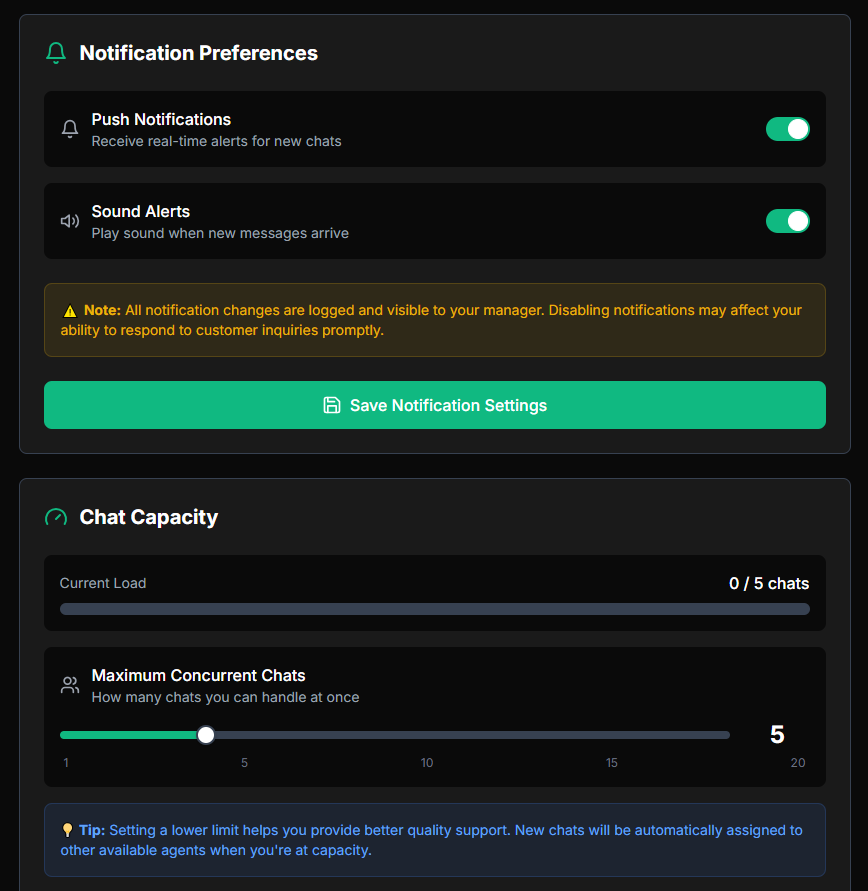
• Notification Preferences: You can toggle Push Notifications (for new messages or handoff requests) and Sound Alerts on or off.